Entertainment
A&E Television's Pick for the Most Influential Person of the Millennium: Who Topped the List and Why It Matters
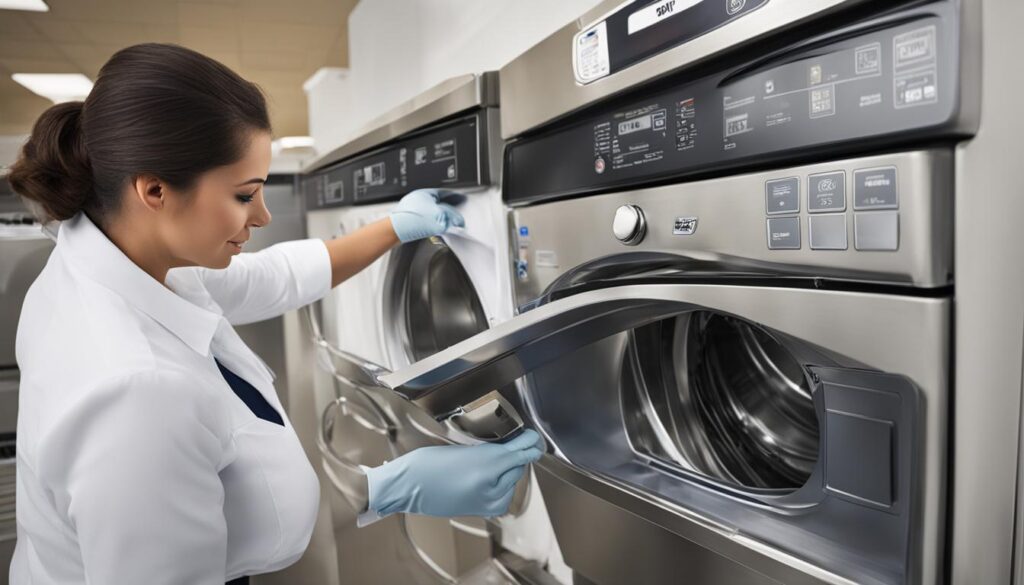
Maintaining your Tress Wellness wax warmer isn’t just about aesthetics-it’s essential for hygiene, safe operation, and ensuring a smooth waxing experience every time. Over time, used wax and residue can build up inside the warmer, affecting its performance and potentially leading to contamination or unpleasant odors. Whether you’re a regular home waxer or using your device for professional purposes, regular cleaning is crucial to prolonging its life and delivering consistent results. This guide offers detailed, actionable steps to keep your wax warmer spotless and ready for every session.

The Tress Wellness wax warmer is designed for both hard and soft waxes, featuring a removable metal pot and digital temperature controls for precise heating. Knowing your device’s components-such as the removable pot, heating element, and external housing-will help you clean effectively without damaging sensitive parts. Always refer to your user manual for specific safety guidelines, and unplug the device before cleaning to avoid electrical hazards.
To clean your wax warmer safely and efficiently, gather the following supplies:
Regular cleaning after every waxing session prevents buildup and keeps your device functioning at its best. Follow these detailed steps for effective maintenance:
Unplug the wax warmer and allow it to cool until the wax is soft but not fully solid. For best results, wait until the wax is pliable but not hot enough to cause burns. This makes it easier to remove the bulk of the wax without spreading it or risking injury [1] .
Using a spatula or plastic scraper, scoop out as much wax as possible from the pot. If the wax has hardened, briefly reheat the warmer until the wax softens, then proceed with removal. Pour leftover wax into a disposable container or silicone mold-never pour wax down the drain, as it can cause clogs. For overflow situations, allow the wax to cool completely and peel away any hardened residue before cleaning further [1] .
Generously spray the inside of the warmer with Tress Wellness After-Wax Spray. This product is specifically formulated to break down wax residue. Allow it to sit for 30 seconds to dissolve stubborn spots. Alternatively, you can use isopropyl alcohol on a soft cloth for particularly tough wax deposits [1] .
Wipe the interior using a paper towel or soft cloth, working in circular motions to remove all residue. For particularly sticky or thick layers, repeat the spray-and-wipe process until the pot is clean. Avoid abrasive scrubbers, as these can scratch the nonstick surface and make future cleaning more difficult [3] .
If your wax warmer features a removable metal pot, detach it and wash with warm, soapy water. Use a soft sponge to gently clean any remaining residue. Rinse thoroughly and allow to dry completely before reassembling. For areas that cannot be submerged (such as the main heating element), only use a damp cloth and avoid letting moisture seep into electrical parts [2] .
Wipe the outside of the warmer with a damp cloth and mild detergent if needed. This prevents wax drips or sticky spots from accumulating. Always avoid getting liquid into the digital controls or heating element [3] .

Once all residue is removed, wipe down the entire device with a clean, dry cloth. This removes any oily residue from sprays or cleaners and prepares your warmer for storage or immediate use. Ensure all components are thoroughly dry before plugging in to prevent electrical hazards [3] .
Sometimes, wax residue can be particularly difficult to remove, especially after multiple uses. In such cases, apply isopropyl alcohol and gently rub with a cloth, repeating as necessary. Avoid sharp tools or steel wool, which can damage your device’s finish. For persistent buildup, repeat the cleaning process after each session to gradually break down the residue [2] .
While Tress Wellness After-Wax Spray is recommended for best results, you may also use a mixture of warm water and vinegar for mild cleaning, or a small amount of baby oil to help dissolve wax. Always test alternative cleaners on a small area first to ensure compatibility with your device’s materials. Some users prefer using a gentle scrub with a soft sponge and soapy water for regular maintenance, especially on removable parts [2] .
To maximize your Tress Wellness wax warmer’s lifespan and maintain hygienic waxing sessions, incorporate these best practices:
Regular maintenance not only extends the life of your device but also ensures a more pleasant and sanitary waxing experience.
Always unplug your wax warmer before cleaning and allow it to cool to a safe temperature. Never pour water or cleaning solutions directly onto electrical components, and avoid using harsh chemicals not approved by the manufacturer. If you encounter resistance when removing buildup, avoid excessive force to prevent damaging the pot’s coating. If spills occur, allow the wax to fully harden before attempting to clean, as hot wax can cause burns or spread further [1] .
For more tips, troubleshooting, or to purchase official cleaning products like the After-Wax Spray, you can visit the Tress Wellness website by searching for “Tress Wellness official site” or by viewing their verified resources and blog guides on wax warmer maintenance. If you need technical support, consider contacting their customer service via the official website’s contact form. For product manuals, look for downloadable PDF guides on the official support page.
Consistent and thorough cleaning of your Tress Wellness wax warmer ensures each waxing session is safe, comfortable, and effective. By following the step-by-step instructions and best practices detailed above, you can significantly extend your device’s life, avoid unwanted residue buildup, and maintain a hygienic environment for every use. For further support, rely on official Tress Wellness resources or reach out to their support team for personalized assistance.
MORE FROM hotondeals.com